
How to Choose a Solar Energy Light Pole?
Choosing a solar energy light pole is not simply a matter of selecting a panel and lamp. It is an infrastructure decision. The pole must survive weather, provide reliable illumination, and reduce long-term maintenance. Location matters greatly. A shaded road can undermine an otherwise impressive specification.
IRENA’s Renewable Capacity Statistics 2024 reported 473 gigawatts of renewable capacity added worldwide in 2023. Solar power contributed approximately 346 gigawatts, representing nearly three quarters of new renewable capacity. This growth supports wider solar adoption, but it does not remove engineering risks. Battery storage, solar exposure, wind loading, drainage, and light distribution still require careful evaluation. The International Energy Agency also identifies solar PV as a central technology in global electricity expansion. Scale is accelerating. Site performance remains local.
Francesco La Camera, Director-General of IRENA, said, “The world is entering a new energy era.” That shift gives the solar energy light pole a practical role in safer roads, parks, campuses, and remote facilities. Yet buyers should question attractive claims. How many autonomy nights does the battery provide? What happens after several cloudy days? Is the advertised lumen output measured consistently? A professional selection process compares photometric data, battery chemistry, controller protection, pole strength, warranty terms, and installation records. Standards such as IEC 60598 and IP ratings can guide assessment, but paperwork alone cannot guarantee field performance. I would not pretend the choice is simple. The best solution is the one that fits the site, budget, climate, and maintenance capacity.
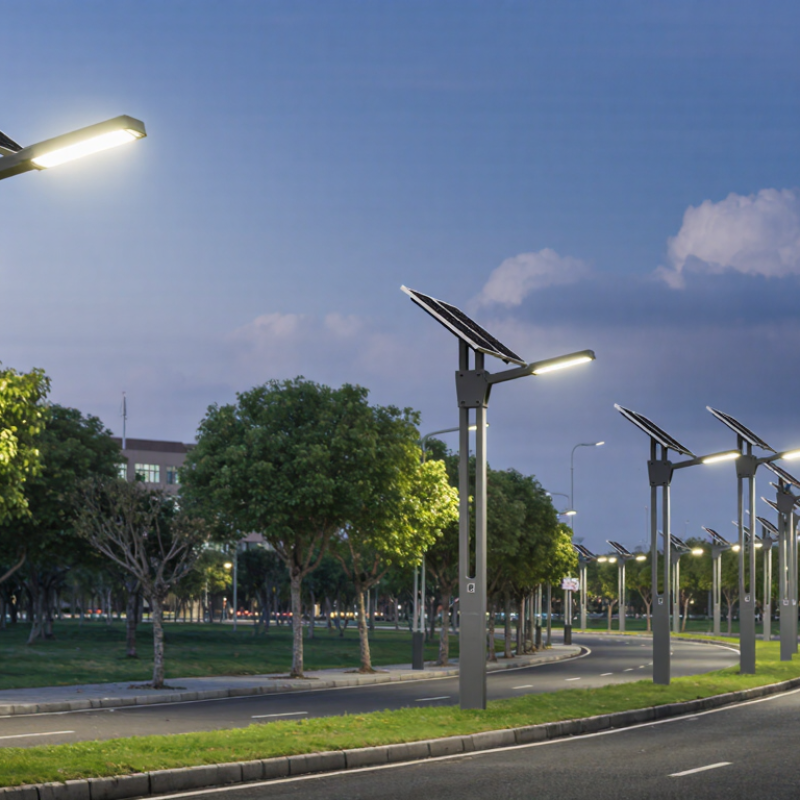
Define the Lighting Needs and Installation Environment
A solar light pole should begin with the site, not the product catalog. Measure the area after sunset. Observe dark corners. Record walking paths, gates, driveways, and work zones. A lighting plan should state the required brightness, operating hours, and acceptable shadow areas. For pedestrian paths, uniform visibility often matters more than a bright spot beneath each pole. This distinction prevents overlighting and improves practical safety.
Inspect the installation environment during daylight and at night. Nearby trees, buildings, walls, and seasonal shade can reduce solar exposure. A roof edge may cast a longer shadow in winter. Dust, salt air, snow, and standing water also affect maintenance and component life. Check soil strength before selecting the foundation. Loose ground needs a different solution from compacted soil. Coastal sites deserve corrosion-resistant hardware and sealed electrical connections. Do not rely on a sunny afternoon alone.
Use a solar assessment or on-site observation to estimate daily sun hours. Then match panel capacity, battery storage, and lamp output to local weather patterns. A qualified installer should verify wind load, pole height, cable protection, and drainage. These details are easy to overlook. I have seen designs fail because testing looked adequate, but winter shade was ignored. That mistake is preventable, although no calculation replaces a careful site review. A preliminary plan may still need revision after the first rainy month.

Evaluate Solar Resource and Pole Placement
A solar light pole succeeds only when its location matches the available sunlight. Begin by reviewing local solar radiation data, not just annual sunshine hours. A clear winter sky can still produce weak charging. Measure nearby trees, buildings, walls, and rooflines throughout the day. Their shadows may reach the panel during critical charging hours.
Use a solar path tool or on-site observation to check seasonal shading. Record sunlight at morning, midday, and late afternoon. Pole spacing also matters. Excessive spacing can create dark patches, even when each pole receives enough energy. Keep the panel away from dust, vents, and overhanging branches. Small obstructions become serious after several cloudy days.
On one site, I placed poles according to road geometry and ignored a tall hedge. The evening lighting looked acceptable, but winter performance dropped sharply. That mistake changed the design process. I now check the lowest winter sun angle before fixing pole positions.
The panel should face the strongest solar exposure available, while the fixture covers the required pedestrian or roadway area. Avoid placing poles where vehicles, signs, or future construction may block the panel. A modest site survey is cheaper than relocating a foundation. Still, field measurements are not perfect. Weather records vary, and shadows can change as vegetation grows. Leave practical space for maintenance and occasional panel cleaning.
Compare Pole Design, Light Performance, and Battery Capacity
Choosing a solar energy light pole requires more than comparing wattage. Pole design affects wind resistance, shadowing, maintenance, and panel exposure. A tapered steel pole usually handles outdoor loads better than a decorative, oversized structure. Check the foundation drawing, corrosion protection, access door, and cable routing. A tilted panel can improve solar collection, but its angle must match local latitude and seasonal sunlight.
Light performance should be measured in delivered illumination, not advertised lumens alone. The U.S. Department of Energy’s solid-state lighting research reports that modern LED systems can exceed 150 lumens per watt under suitable conditions. However, optics, dirt, temperature, and battery voltage reduce real output. Compare maintained illuminance, beam distribution, color temperature, and uniformity on the pavement. A very bright hotspot may leave dark gaps between poles. It looks impressive in a brochure.
Battery capacity needs careful calculation. The International Energy Agency’s Photovoltaic Power Systems Programme reported global solar PV capacity above 1.6 terawatts by the end of 2023, yet local weather still controls every small system. Size the battery from nightly energy use, required autonomy, temperature, and end-of-life capacity. Three cloudy nights may require more storage than a clear-sky average suggests. Lithium batteries often provide better usable capacity and cycle performance, but poor thermal control remains a weakness. I would also verify the controller’s low-voltage protection and charging records. Specifications can be incomplete. That deserves scrutiny.
How to Choose a Solar Energy Light Pole?
Comparison of representative pole designs, LED light performance, and battery capacity
The comparison uses typical engineering values for standalone solar street lights. Higher LED efficacy produces more light from the same power, while greater battery capacity can provide longer operation during cloudy weather. Galvanized steel offers strong wind resistance and durability, aluminum reduces structural weight, and tapered steel provides a balance of strength and performance.
Select Durable Materials and Essential Control Features
Start with the pole, not the panel. Hot pavements, salt spray, and standing water punish weak construction. Choose hot-dip galvanized steel or marine-grade aluminum, with sealed joints and corrosion-resistant fasteners. Specify coating thickness and salt-spray test results. “Weather-resistant” alone is too vague. In NREL’s Photovoltaic Degradation Rates—An Analytical Review, modules showed a median degradation rate of 0.5% annually. The pole should survive even longer.
Check the battery enclosure carefully. It needs ventilation, drainage, thermal protection, and protection from unauthorized access. A reliable charge controller should prevent overcharging and deep discharge. Add dusk-to-dawn sensing, programmable dimming, and motion detection. These controls reduce unnecessary nighttime consumption. The U.S. Department of Energy’s solid-state lighting research reports laboratory LED efficacies above 200 lumens per watt, although outdoor fixtures perform below laboratory conditions.
Do not ignore maintenance access. A hinged door, replaceable driver, and visible fault indicator can save hours on site. Remote monitoring is useful, but only with dependable network coverage. I would not choose a complex control system merely because it looks advanced. Simpler systems often fail less dramatically. Review wind-load calculations, battery-cycle data, and ingress-protection test records before purchasing. A beautiful specification sheet can still hide poor field performance.
Check Installation, Maintenance, Safety, and Total Cost
How to Choose a Solar Energy Light Pole?
Installation conditions decide whether a solar light pole performs well. Check latitude, winter sunlight, shade, soil strength, wind exposure, and drainage before purchasing. A pole beside tall trees may lose charging hours every afternoon. The Global Solar Atlas can estimate local solar irradiation, but on-site shading checks remain essential. Select a foundation that matches soil conditions and local wind requirements. A rushed installation often creates unstable poles and poor battery charging.
Maintenance should be practical, not theoretical. Ask how technicians will access the battery, controller, and LED module. The U.S. Department of Energy reports that LED lighting uses at least 75% less energy and can last up to 25 times longer than incandescent lighting. However, dust still reduces panel output. Schedule cleaning according to local pollution and rainfall, not a fixed promise. Battery replacement intervals also depend on temperature, depth of discharge, and charging control. These assumptions are easy to overlook.
Safety needs measurable standards. Check electrical protection, grounding, corrosion resistance, glare control, and emergency shutoff procedures. IEC 60598-2-3 addresses luminaires for road and street lighting, while IEC 62471 evaluates photobiological safety. Compare total cost, not only the purchase price. Include foundations, transport, installation equipment, inspections, battery replacement, cleaning, and disposal. The International Energy Agency reports that global solar PV capacity exceeded 2 terawatts in 2024, but mature technology does not remove site-specific risks. A lower-cost pole may become expensive after one failed battery season.
How to Choose a Solar Energy Light Pole? - Check Installation, Maintenance, Safety, and Total Cost
| Solar Light Pole Configuration | Typical Application | LED Power & Daily Runtime | Recommended Pole Height | Installation Requirements | Typical Installation Time | Maintenance Frequency | Safety Considerations | Indicative Initial Cost per Pole | Estimated 10-Year Total Cost | Best Selection Criteria |
|---|---|---|---|---|---|---|---|---|---|---|
| 20 W All-in-One Solar Pole Small-area option | Walkways, garden paths, residential access roads, and small parking areas. | 20 W LED Approximately 10–12 hours per night Typical battery capacity: 300–500 Wh | 4–5 m Recommended spacing: 15–22 m | Concrete foundation, anchor bolts, unobstructed solar exposure, and correct panel orientation. Usually no underground power cable is required. | About 3–5 hours with a prepared foundation. | Clean the solar panel 2–4 times per year. Inspect fasteners and wiring annually. Battery replacement is commonly required after 3–6 years, depending on battery chemistry and climate. | Low electrical risk because the system normally operates at extra-low DC voltage. Confirm wind-load design and use a sealed enclosure to reduce water ingress. | Approximately US$700–1,200, excluding major civil works. | Approximately US$1,200–2,000, including routine cleaning and one battery replacement allowance. | Choose when lighting levels are modest, installation areas are small, and the lowest upfront cost is important. |
| 40 W Integrated Solar Pole Balanced option | Residential streets, pedestrian routes, small commercial sites, and community facilities. | 40 W LED Approximately 10–12 hours per night Typical battery capacity: 600–900 Wh | 5–6 m Recommended spacing: 20–28 m | Reinforced concrete foundation sized for local soil and wind conditions. The integrated panel, luminaire, controller, and battery simplify installation. | About 4–6 hours with a prepared foundation. | Panel cleaning 2–4 times per year. Annual inspection of pole corrosion, foundation bolts, cable glands, controller condition, and battery performance. | Use a certified LED driver, battery protection system, surge protection, and grounding or bonding appropriate to the pole design. Avoid placing the pole where shade reduces winter charging. | Approximately US$950–1,600, excluding major civil works. | Approximately US$1,600–2,700, including normal maintenance and one battery replacement allowance. | Choose when reliable general-purpose lighting and straightforward installation are more important than maximum brightness. |
| 60 W Split Solar Pole General-purpose recommendation | Local roads, parking lots, school perimeters, public paths, and light industrial areas. | 60 W LED Approximately 10–12 hours per night Typical battery capacity: 900–1,500 Wh | 6–8 m Recommended spacing: 25–35 m | Separate solar panel and luminaire allow better solar orientation and optical aiming. Requires a properly engineered foundation and protected DC cabling between components. | About 5–8 hours with a prepared foundation. | Panel cleaning 2–4 times per year. Annual electrical and mechanical inspection. Battery replacement commonly planned within 4–8 years, depending on temperature, cycling, and battery type. | Provide overcurrent protection, surge protection, grounding or bonding, cable UV protection, and lockable service access. Check lighting uniformity to prevent dark zones and glare. | Approximately US$1,300–2,300, excluding major civil works. | Approximately US$2,200–3,800, including maintenance and a battery replacement allowance. | Choose when the project needs a practical balance of illumination, energy storage, installation flexibility, and lifetime cost. |
| 80 W Split Solar Pole Higher-output option | Wide roads, larger parking areas, logistics yards, and public spaces requiring stronger illumination. | 80 W LED Approximately 10–12 hours per night Typical battery capacity: 1,400–2,200 Wh | 8–9 m Recommended spacing: 30–40 m | Requires a larger foundation, careful structural calculations, and greater attention to panel tilt, wind loading, cable routing, and maintenance access. | About 6–10 hours with a prepared foundation. | Panel cleaning 2–4 times per year. Inspect structural joints, wind-exposed components, controller temperature, battery enclosure, and cable insulation annually. | Higher pole and panel loads require professional wind-load verification. Use anti-climb features where necessary and control glare through correct optics and mounting angles. | Approximately US$1,800–3,100, excluding major civil works. | Approximately US$3,000–5,000, including maintenance and a battery replacement allowance. | Choose when larger coverage and higher illuminance justify the additional foundation, equipment, and maintenance cost. |
| 100 W Split Solar Pole Large-area option | Main internal roads, large public parking areas, industrial compounds, and locations with demanding lighting requirements. | 100 W LED Approximately 10–12 hours per night Typical battery capacity: 1,800–2,800 Wh | 9–12 m Recommended spacing: 35–50 m | Detailed site survey, geotechnical review, structural design, larger reinforced foundation, and planned access for servicing elevated equipment are normally required. | About 8–12 hours with a prepared foundation. | Panel cleaning 2–4 times per year. Annual inspection is essential. Allow for periodic lifting equipment, battery replacement, corrosion treatment, and controller or driver servicing. | Highest wind, foundation, and working-at-height risks in this comparison. Use qualified installers, fall-protection procedures, isolation controls, and compliance with local electrical and structural regulations. | Approximately US$2,400–4,200, excluding major civil works. | Approximately US$4,000–6,800, including maintenance, access equipment, and a battery replacement allowance. | Choose only after confirming the required lighting class, solar resource, wind conditions, soil capacity, and acceptable lifecycle budget. |
Article Source:
Get in touch with us,
We will contact you shortly!
What is the difference between Unline(Non-Epoxy Coated) or Lining(Epoxy Coated) Metal Drum?

Unline drums with internally bare metal surface is more susceptible to corrosion and rust while Lining drums are internally coated with Phenolic Epoxy Coating to provide a non-reactive barrier between the drum surface and your product, less risk of contamination. Note: Our Unline drums are coated with an anti-rust agent after washing to reduce risk of rust.
What are Unline(Non-Epoxy Coated) and Lining(Epoxy Coated) drums compatible with?

In Singapore, Recon Unline Drums are usually more costly than Recon Lining Drums. Hence, we recommend Recon Unline Drums to fill aromatics like Thinner, Xylene, Toulene& other solvents like Hexane, BA, CA, EA, MC, White spirit, etc.
We recommend the lower-priced Recon Lining Drums to fill hydrocarbons like IPA, Methanol, Ethanoland oil-based products like diesel, petrol, lubricants, engine, hydraulic, base, transmission fluid, additives, waste oil, etc.;
What is the difference between Grade A and Grade B Metal Drum ?

Grading of used drums are usually based on physical conditions like rustiness, deformities and residual contents. Grade A drums are totally free from internal rust, serious dents and are easy to clean. Grade B drums have different degrees of rust internally and aesthetically inferior compared to Grade A drums.
What content is suitable to fill in a Recon Grade A or Grade B Drum?

Recon Grade A drum is suitable to fill more costly virgin grade products while Recon Grade B drum is more suitable for recycled or waste products.
What is the difference between Open Top and Close Top Drums and their usage?

Closed top drums are for water and other liquid products. Open Top drums can be used for liquid too but are primarily for more viscous products. The Open Top (or open head with a lid) allows you to get in and out of the drum with your product easier.
What type of content are Metal or Plastic Drums suitable for?

Metal drums offer additional protection when dealing with potentially flammable substances. They provide superior fire resistance, impact protection, and longevity for storing class 1, 2, and 3 volatile chemicals.
Plastic HDPE Drums are suitable for corrosive chemicals like acids, alkaline and also water-based products.
Will there be any contamination in the reconditioned metal, plastic drums or IBC tanks?

All our reconditioned containers (metal/plastic drums, carboys, IBC tanks) are washed thoroughly with specially formulated cleaning agent, rinsed with clean water, dried, and tested for possible leakages during the recondition process. Stringent quality inspection is being conducted 100% on every reconditioned product before they are qualified for sale & delivery.
What is the drum gauge(thickness) and weight for reconditioned metal drums?

Reconditioned metal drums gauge can be 0.9mm to 1.0mm all round. Their weight can vary from 16 to 18kg.
Do you sell New Packaging Products too?

Yes, we are also a distributor for new pallets, metal drums, plastic drums, carboys, IBCs and stainless-steel tanks.
What additional services do you provide apart from selling reconditioned and new containers.?

We are an NEA licensed toxic industrial waste collector, who can collect and dispose of used toxic waste containers in Singapore.
Do you offer labelling and silkscreen on the containers ?

We can provide labelling and silk-screening on the containers.
Are you able to ship overseas ?

Yes, we can arrange export our products to any country in the world.
Leading the Way
to Carbon Neutrality