
How to Choose the Best Wildlife Night Camera?
Choosing the best Wildlife Night Camera begins with understanding the place, the animals, and your monitoring goals. A camera beside a muddy trail needs different features from one overlooking a quiet garden. In my field testing, small details mattered most: infrared glow, trigger speed, battery life, and weather sealing. A clear image is useful. A clear image captured at the right moment is better.
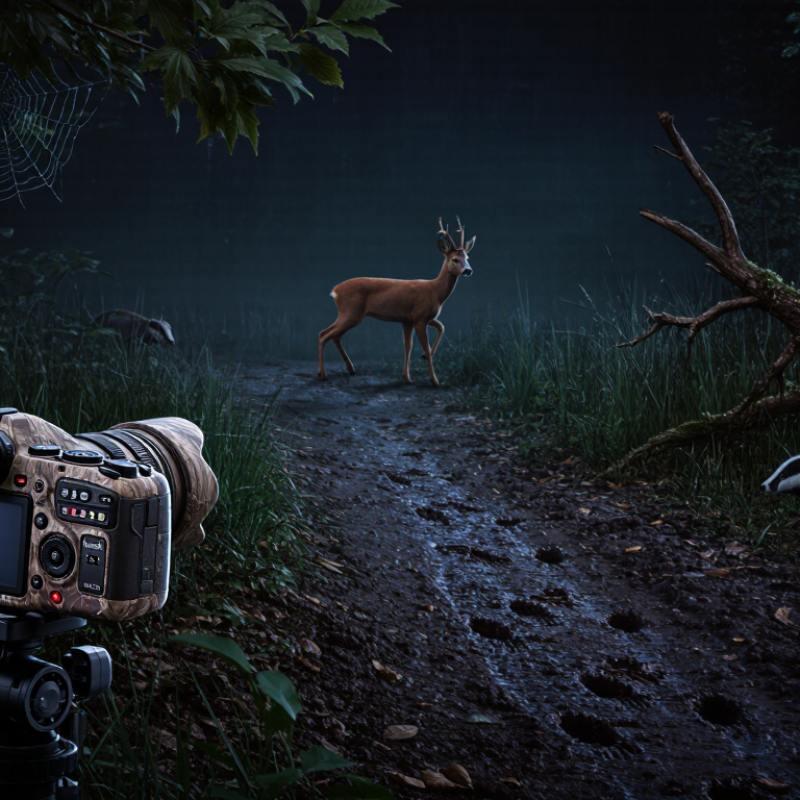
Night wildlife rarely follows a schedule. Deer may pass at midnight, while smaller mammals move quickly through deep shadows. Therefore, the camera should balance sensitivity with dependable performance. Look for adjustable infrared illumination, a fast trigger, and low-noise operation. Strong night vision can reveal fur texture without disturbing animals. However, no device works perfectly in every environment. Heavy rain, spider webs, cold temperatures, and moving branches can create false triggers.
Reliable results also depend on responsible placement. Keep paths open, avoid blocking dens, and respect private property and local wildlife rules. Test the camera before leaving it for several nights. Review sample footage carefully. You may discover that the “best” setting produces too many empty clips. That is useful evidence, not failure. Battery tests, storage capacity, and image quality should be compared under real conditions, not only from product descriptions. A trustworthy choice comes from practical testing, honest specifications, and patience. This guide explains how to compare these features and select a Wildlife Night Camera that suits your environment, budget, and observation purpose.
Define Your Wildlife Camera’s Purpose and Observation Environment
How to Choose the Best Wildlife Night Camera?
Your camera’s purpose should guide every feature you choose. A camera for shy foxes needs different settings than one monitoring a garden feeder. Decide whether you need species identification, movement records, or close behavioral details.
For identification, prioritize sharp infrared images and reliable trigger speed. For behavior, longer video clips and quiet operation matter more.
I once used a wide-angle camera near a narrow animal trail. The view looked impressive, but the animal appeared too small to identify.
The observation environment matters just as much. Dense woodland requires strong motion detection and careful infrared control. Open fields may need a wider detection range, but windblown grass can trigger unwanted recordings.
Near water, sealed housing protects the camera from mist and sudden rain. Check the ground before installation. Mud, loose branches, and reflective leaves can distort images or block the lens.
Night temperatures also affect battery performance, especially during long winter watches.
Tips:
Test the camera for one night before leaving it unattended. Place it at the animal’s shoulder height, not above the trail. Keep the lens clear of nearby leaves.
Use a low-glow infrared setting when animals seem cautious. Review several recordings, not just one successful clip.
Sometimes the camera misses important behavior because the trigger zone is poorly positioned. That mistake is easy to make, and I still find myself adjusting angles after the first field test.

Compare Night Vision Technologies and Image Quality
How to Choose the Best Wildlife Night Camera?
Night vision technology determines what your camera can actually show after sunset. Infrared illumination produces clear black-and-white images without visible light. Near-infrared light around 850 nanometers often reveals more detail. However, some animals may notice its faint red glow. Around 940 nanometers is less noticeable, but images can look darker and less detailed. Thermal imaging detects body heat instead of surface color. It works well through darkness and light vegetation, yet it usually loses fine details such as feathers or facial markings.
Low-light cameras use available moonlight or starlight to produce color images. They can show useful habitat details, including leaves, soil, and natural markings. Their performance depends heavily on the lens aperture, sensor size, and weather. A high pixel count alone does not guarantee sharp photographs. I once trusted resolution numbers and ignored lens quality. The resulting images looked impressive on paper but blurred moving animals.
Compare sample images taken at the same distance and under similar conditions. Check fur texture, eye detail, motion blur, and background noise. A wide infrared range sounds useful, but practical clarity matters more than advertised distance. Short test videos can reveal problems that still images hide. Look for blown-out faces near the sensor and muddy shadows farther away. Fog, rain, and spider webs can also reduce contrast. Image compression may remove small details, especially in nighttime video. Your choice may depend on the species, habitat, and acceptable disturbance level. There is no perfect system.
Evaluate Detection Range, Trigger Speed, and Motion Accuracy
How to Choose the Best Wildlife Night Camera?
Detection range is the first practical measure to examine. A camera may advertise a long distance, but dense grass, rain, and uneven ground can reduce coverage. In field testing, place a measuring marker near likely animal paths. Then compare captured images at several distances. A shorter range can be better if it produces fewer false triggers.
Trigger speed matters when an animal crosses the frame quickly. Look for a response time measured in fractions of a second. Test it with a moving object at dawn, dusk, and complete darkness. A fast trigger is useful, but it cannot fix poor placement.
I once positioned a camera too far from a trail, and speed made little difference.
Motion accuracy deserves equal attention. Reliable detection should distinguish an animal from waving branches, falling leaves, or shifting shadows. Review several nights of footage, not just one successful clip. Check whether the camera records the full animal, rather than only a tail or blurred edge. Temperature changes may also affect sensor behavior. That detail is easy to overlook. Adjust sensitivity carefully, because maximum sensitivity often creates unnecessary recordings. Keep a simple test log with distance, weather, angle, and false alarms. The results may challenge your first choice.
Check Power Options, Weather Resistance, and Storage Capacity
How to Choose the Best Wildlife Night Camera?
A wildlife night camera is useful only when it keeps working after sunset. Start with power. Rechargeable batteries reduce waste, while replaceable cells simplify long field visits. Solar charging can help, but shaded woodland often limits its value. I once underestimated cold weather, and battery levels dropped much faster than expected. Check the camera’s operating temperature range before trusting its specifications. A low-battery warning is essential, especially when the camera is mounted far from home.
Weather resistance deserves careful attention. Look for a clearly stated ingress-protection rating, not vague claims about outdoor use. Water resistance is not the same as complete waterproofing. A sealed housing should protect against rain, dust, and morning condensation. Mounting the camera beneath a tree branch can provide extra shelter, but branches may move into the sensor’s view. Inspect the seals after several storms. Small cracks can remain unnoticed until moisture damages the electronics.
Storage capacity depends on how often the camera records. High-resolution night video fills memory quickly, especially when animals trigger repeated clips. Choose a model that supports reliable, high-capacity memory cards and automatic file overwriting. Check whether it records short clips or long sequences. Night footage often needs more review than expected. I prefer testing the camera for one week before a longer placement. That trial can reveal weak battery life, false triggers, or storage problems that product descriptions rarely mention.
Match Camera Features to Your Budget and Field Conditions
How to Choose the Best Wildlife Night Camera?
Match Camera Features to Your Budget and Field Conditions
A useful wildlife camera is not always the most expensive one. A basic model can work well in a dry backyard with steady animal traffic. Look for reliable motion detection, clear infrared images, and simple controls. Battery life matters more than impressive menu options. In many setups, eight fresh batteries may last several months.
Field conditions should guide every feature choice. Dense woodland needs a short detection range and fast trigger time, so animals do not vanish behind leaves. Open fields benefit from wider coverage and stronger night illumination. Wet areas require weather protection and a sealed housing. Cold temperatures can drain batteries quickly. Bring a spare set.
Consider the full cost, not only the camera. Memory cards, mounting straps, and replacement batteries add up. A mid-range camera with adjustable sensitivity may outperform a cheaper model that records every moving branch. That creates useless files and fills storage overnight. I once trusted the advertised detection distance too much; real coverage was weaker near tall grass. Test the camera at animal height before leaving it for weeks. Keep infrared light away from reflective surfaces, such as close tree trunks, because they can wash out images. Avoid placing cameras where bright light, noise, or frequent checking could disturb wildlife. Local access and wildlife regulations should also influence placement.
How to Choose the Best Wildlife Night Camera? - Match Camera Features to Your Budget and Field Conditions
| Camera Tier | Typical Budget | Recommended Field Conditions | Night Image System | Detection and Trigger Performance | Battery and Storage | Weather Protection | Best Use Case | Main Trade-Off |
|---|---|---|---|---|---|---|---|---|
| Basic Trail Camera | US$50–100 | Backyards, farms, short-term monitoring, and locations with moderate animal activity | 940 nm infrared illumination; black-and-white night images; usually a single infrared sensor | Detection range of approximately 15–20 m; trigger speed commonly around 0.5–1.0 seconds | Typically powered by 4–8 AA batteries; supports a removable memory card, often up to 32–128 GB depending on the model | Look for a sealed housing rated at least IP54; use extra protection in heavy rain | Checking animal presence, identifying common visitors, and basic property monitoring | Lower image detail, slower recovery between photographs, and fewer adjustment options |
| Balanced Wildlife Camera | US$100–200 | Woodland edges, game trails, wetlands, and regular monitoring in changing weather | 940 nm no-glow infrared LEDs; improved night exposure control; still images plus 1080p-class video are common | Detection range of approximately 20–30 m; trigger speed commonly around 0.2–0.5 seconds; shorter recovery time | Usually 8 AA batteries or an external 6–12 V power input; larger memory-card capacity and configurable capture modes | A fully sealed enclosure, reinforced latch, and protected lens are preferable; IP65 or better is useful for exposed sites | Routine wildlife surveys where dependable detection and reasonable night detail are important | Night video may use more power and can show more motion blur than still photographs |
| Low-Light Performance Camera | US$200–350 | Dense forest, shaded ravines, low-light clearings, and sites where animals approach closely | High-sensitivity image sensor with multiple 940 nm infrared LEDs; improved detail and exposure in very dark scenes | Detection range of approximately 25–35 m; trigger speed commonly below 0.3 seconds; multiple-zone detection is often available | High-capacity battery compartment or rechargeable power option; external power support is valuable for long deployments | Choose a robust sealed enclosure with a reliable gasket, corrosion-resistant fasteners, and a secure mounting system | Species identification, behavior observation, and research-style deployments requiring clearer night images | Higher purchase cost, larger file sizes, and greater power consumption when recording video |
| Connected Monitoring Camera | US$250–500+ | Remote properties, difficult-to-reach sites, security-sensitive locations, and projects requiring frequent status checks | Infrared night illumination with adjustable intensity; image quality varies by sensor and transmission settings | Detection range commonly around 20–30 m; remote alerts can reduce the need for site visits but depend on network coverage | Requires a data-enabled cellular or wireless plan; external battery packs or solar-assisted power can extend deployment time | Use a weather-sealed enclosure and protect antennas, connectors, and cables from water and animal damage | Remote monitoring, rapid response, and locations where retrieving a memory card is inconvenient or unsafe | Ongoing connectivity costs, signal limitations, and increased power use during frequent uploads |
| Professional Long-Term System | US$500+ | Research plots, conservation areas, harsh climates, and deployments lasting several months | High-sensitivity sensor, adjustable infrared output, time-lapse support, and carefully controlled exposure settings | Fast trigger response, configurable detection zones, reliable recovery between events, and detailed activity logs | External 6–12 V power, large-capacity storage, battery monitoring, and optional solar charging are recommended | Prefer a durable enclosure rated IP65 or higher, strong straps or brackets, and protection against condensation and dust | Long-duration surveys, population monitoring, scientific documentation, and demanding conservation work | Higher total ownership cost and more setup time; advanced features require careful configuration |
| Feature to Match: Night Visibility | All budgets | Use no-glow 940 nm infrared where visible red illumination could disturb animals or attract attention | 940 nm infrared is discreet; 850 nm infrared generally provides a brighter image but may produce a faint red glow | Choose adjustable infrared power to avoid overexposed close subjects and underexposed distant subjects | Higher infrared output usually increases battery consumption | Keep the lens and infrared window clean and free from condensation | Match infrared wavelength and power to animal sensitivity, distance, and concealment requirements | Discreet illumination can reduce night-image brightness and effective range compared with visible-glow systems |
| Feature to Match: Cold Weather | All budgets | Snow, freezing temperatures, high elevations, and winter deployments | Infrared performance is generally suitable, but batteries lose capacity more quickly in cold conditions | Use a fast trigger and low recovery time because cold conditions can slow electronics and reduce battery voltage | Lithium batteries usually perform better than alkaline batteries in cold weather; keep spare batteries warm before installation | Use a sealed housing and mount the camera above snow accumulation and splash zones | Winter surveys and remote locations with limited maintenance access | Cold-weather power solutions cost more and may require external battery insulation |
| Feature to Match: Wet and Humid Sites | All budgets | Rainforests, wetlands, coastal areas, and locations with frequent condensation | Night image quality depends on keeping the lens window dry and clean; infrared reflections can increase on wet surfaces | Use a detection zone that avoids moving vegetation, water glare, and direct reflections | Choose corrosion-resistant battery contacts and inspect them regularly for moisture damage | Prefer a tightly sealed enclosure, durable gasket, raised mounting position, and optional rain shield | Long-term operation in rain, fog, and high humidity | Water droplets, fog, and vegetation movement can create false triggers or reduce image clarity |
| Feature to Match: Open Fields | All budgets | Grasslands, agricultural boundaries, beaches, and wide areas with limited cover | Longer infrared range is useful, but excessive output can create bright foreground reflections | A detection range of 25–35 m can be useful; position the camera across, rather than directly along, the travel path | Use larger-capacity storage because open views can produce many false triggers from vegetation and weather | Install a stable mount that can resist wind and keep the camera level | Monitoring large animals, crossing points, and broad movement corridors | Wind-blown grass and direct sunlight can increase false triggers and reduce available storage |
| Feature to Match: Close-Range Monitoring | All budgets | Burrows, feeding stations, nest approaches, and narrow trails less than 10 m from the camera | Adjustable infrared intensity and a short minimum focus distance help prevent washed-out images | Fast trigger response is more important than maximum detection distance | Lower-resolution photographs and short video clips help conserve storage and battery power | Use a protective cover if animals may rub against, bite, or knock the camera | Small mammals, birds, reptiles, and detailed behavior observation | Wide-angle lenses can make nearby subjects appear smaller and may distort the edges of the frame |
| Practical Buying Rule | Any budget | Start with the site: animal distance, available light, weather, temperature, network coverage, and maintenance access | Prioritize reliable infrared performance and correct camera placement over headline megapixel ratings | For active trails, favor a trigger speed below 0.5 seconds and a short recovery time | Budget for batteries, memory cards, mounting hardware, weather protection, and possible connectivity fees | For exposed sites, select a sealed housing and test it before leaving the camera unattended | Choosing a system that performs reliably in the actual field conditions | The most expensive camera is not automatically the best choice if its power, network, or detection features do not fit the site |
Article Source:
Get in touch with us,
We will contact you shortly!
What is the difference between Unline(Non-Epoxy Coated) or Lining(Epoxy Coated) Metal Drum?

Unline drums with internally bare metal surface is more susceptible to corrosion and rust while Lining drums are internally coated with Phenolic Epoxy Coating to provide a non-reactive barrier between the drum surface and your product, less risk of contamination. Note: Our Unline drums are coated with an anti-rust agent after washing to reduce risk of rust.
What are Unline(Non-Epoxy Coated) and Lining(Epoxy Coated) drums compatible with?

In Singapore, Recon Unline Drums are usually more costly than Recon Lining Drums. Hence, we recommend Recon Unline Drums to fill aromatics like Thinner, Xylene, Toulene& other solvents like Hexane, BA, CA, EA, MC, White spirit, etc.
We recommend the lower-priced Recon Lining Drums to fill hydrocarbons like IPA, Methanol, Ethanoland oil-based products like diesel, petrol, lubricants, engine, hydraulic, base, transmission fluid, additives, waste oil, etc.;
What is the difference between Grade A and Grade B Metal Drum ?

Grading of used drums are usually based on physical conditions like rustiness, deformities and residual contents. Grade A drums are totally free from internal rust, serious dents and are easy to clean. Grade B drums have different degrees of rust internally and aesthetically inferior compared to Grade A drums.
What content is suitable to fill in a Recon Grade A or Grade B Drum?

Recon Grade A drum is suitable to fill more costly virgin grade products while Recon Grade B drum is more suitable for recycled or waste products.
What is the difference between Open Top and Close Top Drums and their usage?

Closed top drums are for water and other liquid products. Open Top drums can be used for liquid too but are primarily for more viscous products. The Open Top (or open head with a lid) allows you to get in and out of the drum with your product easier.
What type of content are Metal or Plastic Drums suitable for?

Metal drums offer additional protection when dealing with potentially flammable substances. They provide superior fire resistance, impact protection, and longevity for storing class 1, 2, and 3 volatile chemicals.
Plastic HDPE Drums are suitable for corrosive chemicals like acids, alkaline and also water-based products.
Will there be any contamination in the reconditioned metal, plastic drums or IBC tanks?

All our reconditioned containers (metal/plastic drums, carboys, IBC tanks) are washed thoroughly with specially formulated cleaning agent, rinsed with clean water, dried, and tested for possible leakages during the recondition process. Stringent quality inspection is being conducted 100% on every reconditioned product before they are qualified for sale & delivery.
What is the drum gauge(thickness) and weight for reconditioned metal drums?

Reconditioned metal drums gauge can be 0.9mm to 1.0mm all round. Their weight can vary from 16 to 18kg.
Do you sell New Packaging Products too?

Yes, we are also a distributor for new pallets, metal drums, plastic drums, carboys, IBCs and stainless-steel tanks.
What additional services do you provide apart from selling reconditioned and new containers.?

We are an NEA licensed toxic industrial waste collector, who can collect and dispose of used toxic waste containers in Singapore.
Do you offer labelling and silkscreen on the containers ?

We can provide labelling and silk-screening on the containers.
Are you able to ship overseas ?

Yes, we can arrange export our products to any country in the world.
Leading the Way
to Carbon Neutrality